Ethereum Zero to Hero: Developing Our First Contract
Developing a basic contact using Ethereum
This is the third part of our Ethereum Zero to Hero guide. If you have not read the previous post, I highly recommend checking it before moving forward.
In this post we are going take were we left off and start developing a basic Smart Contract and learn more about solidity and how the contracts work.
One of the most interesting qualities of the Ethereum blockchain is the ability create digital tokens. Tokens are digital assets that can represent anything from coins, loyalty points to actual objects in the physical world. Tokens can also be used to interact with other smart contracts.
Tokens are sold and traded as a cryptocurrency inside the ethereum network and allows the user to pay for smart contract transactions fees, for our first contract we are going to create the minimum viable contract needed to deploy on our private network.
A Word on ERC20
Often when dealing with Tokens, you will see the word ERC20 being referenced. ERC20 is a token standard that describes the functions and events that an Ethereum token contract has to implement, by following this standard we guarantee that tokens will be instantly compatible with the ethereum wallet and any other client or contract that uses the same standard.
In order for a token to be ERC20 complaint it must implement the following:
For more details on ERC20 standard view the following links:
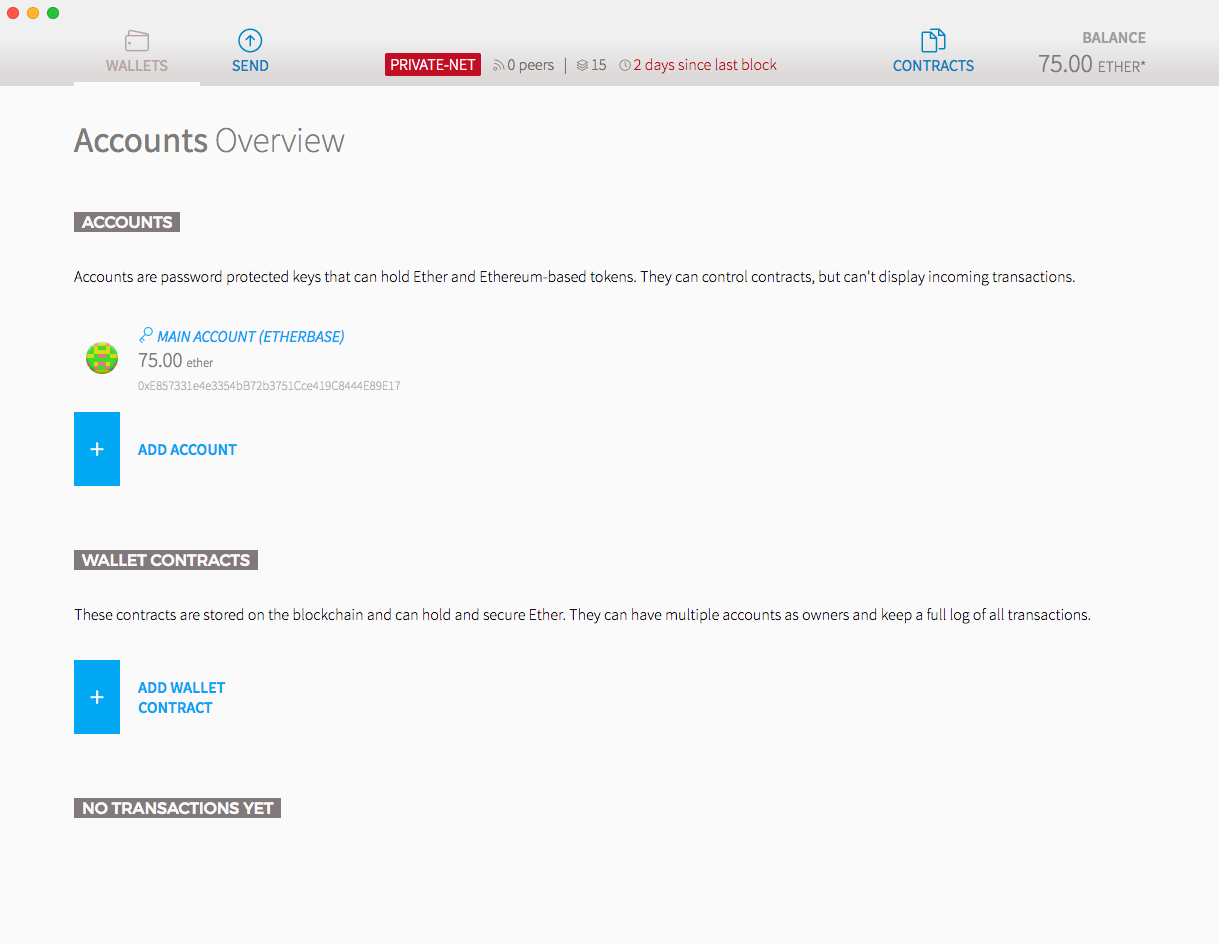
The Ethereum Wallet
The Ethereum Wallet is a gateway to decentralized applications on the Ethereum blockchain. It allows you to hold and secure ether and other crypto-assets built on Ethereum, as well as write, deploy and use smart contracts.
Up to this point, we have worked directly on the Geth console, and while I highly recommend Ethereum developers to become familiar and acquainted with Geth in order to understand some of the Ethereum inner-workings in order to move faster and work smarter, we will switch to the official Ethereum wallet:
Make sure to download and install the ethereum wallet before continuing.
Connecting the wallet to our private testnet
By default the Ethereum Wallet will attempt to connect to the main network, as well it will allow you to connect to one of the test networks.
For our purposes we want it to automatically start connected to our testnet, so do the following before opening the wallet:
DISCLAIMER: The following operations will override any local information for the main network, this could potentially result in the loss of ether, be careful and understand the commands you are running.
- Stop the running geth node
- Run the following command
geth --datadir ./TestNetData --identity "HeroNode1" --ipcpath ~/Library/Ethereum/geth.ipc --networkid 24 --maxpeers 1 consoleNow we can open our ethereum wallet, and it should automatically connect to the test network, what we did was restarting our Geth node, and setting the IPC (Inter-process Communication) pipe in the same place the wallet has its default, by doing so the wallet will directly establish a connecting to our Geth node instead of creating one to the main network.
Make sure the wallet is displaying the name of the network as Private-Net before continuing.
Minimum Viable Token
As we learned in the first post of this series, contracts are programmed using the Solidity language; there are several tools available for compiling, debugging and writing solidity contracts, for the time being, we are going to use solidity contract editor that is shipped with the ethereum wallet.
Here is the code for our minium viable token:
Now grab the source code from above and paste it in the Solidity Contract Source Code field. The wallet will automatically check if the code compiles and if it does, you will see a "pick a contract" dropdown on the right like so:
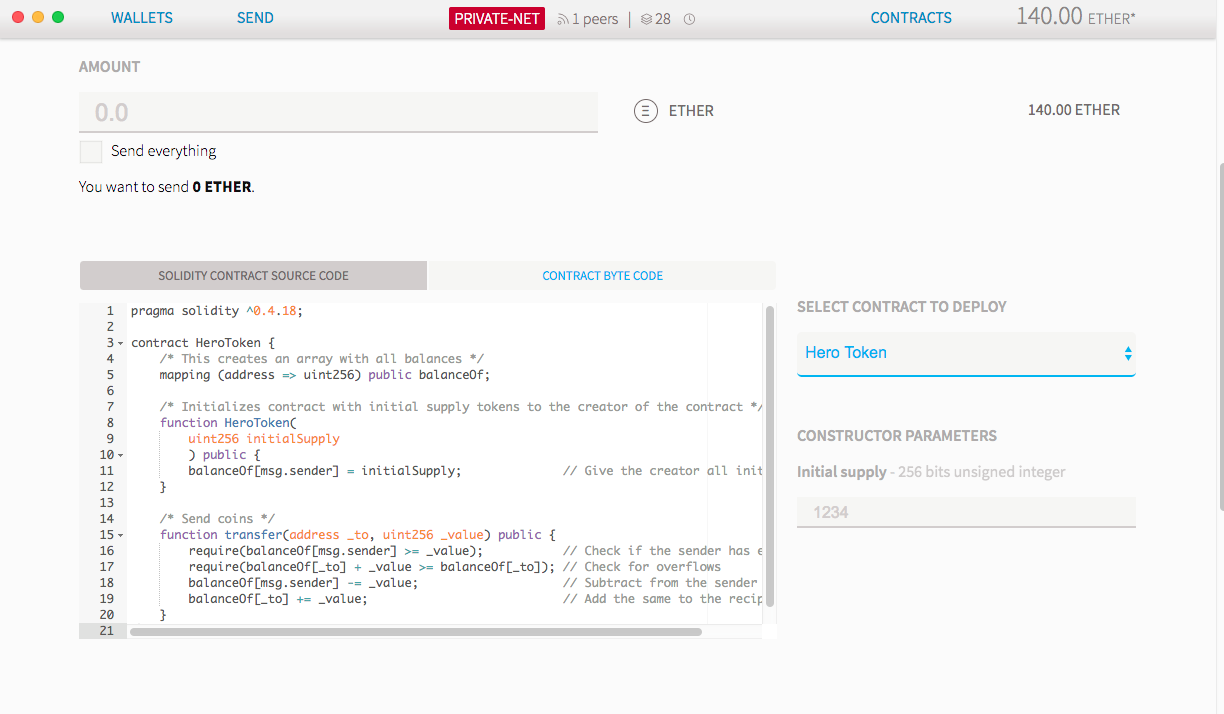
One interesting thing to notice is that there is also one constructor parameter, in this case, an initial supply of Hero Tokens, that will be an issue on contract creation.
If you keep scrolling down, you'll see an estimate of the computation cost of that contract, and you can select a fee on how much ether you are willing to pay for it. Don't forget to set the initial number of tokens we will issue, now go ahead and click the "deploy" button.
Next, you will see a confirmation dialog like the following:
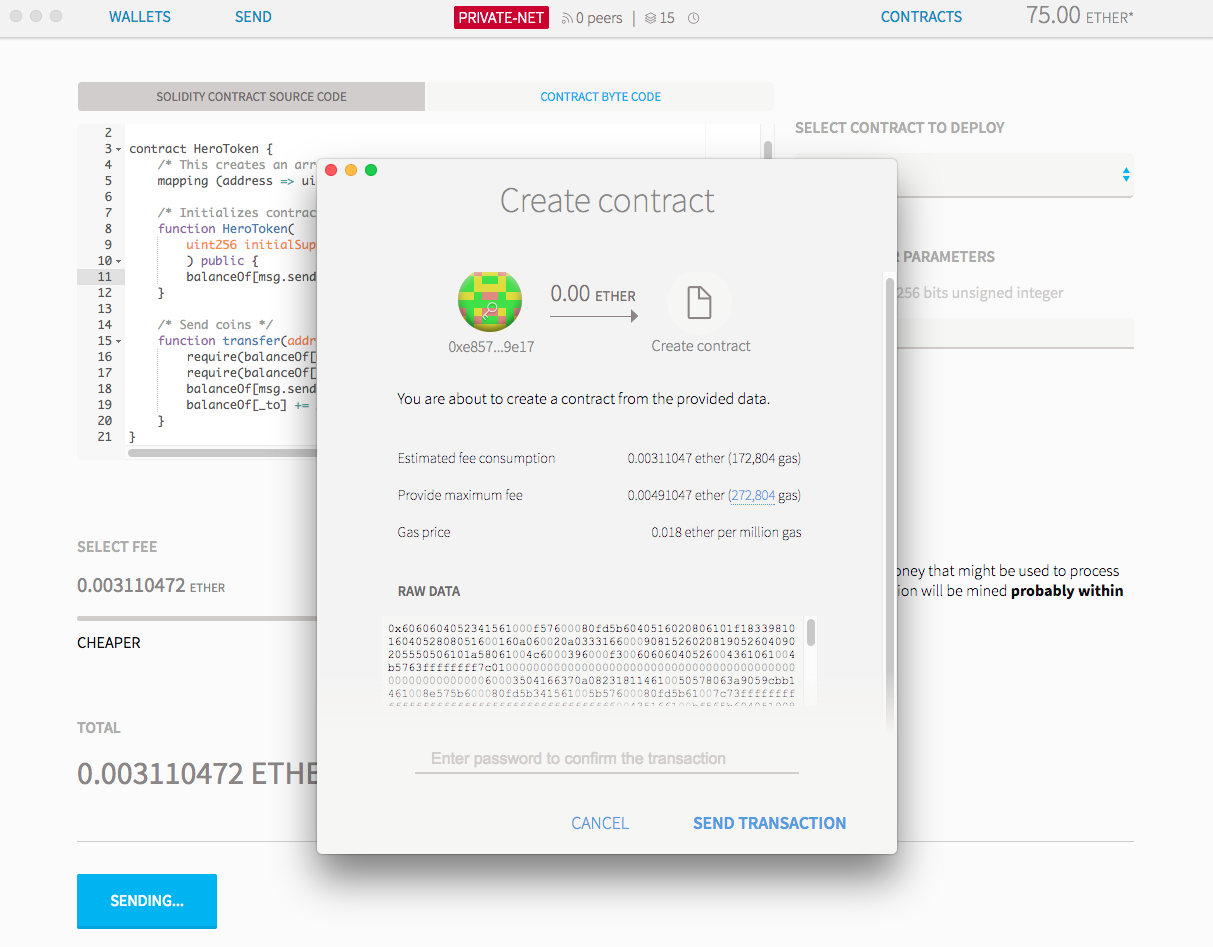
Once the contract has been submitted, you should see it in the latest transactions below, waiting for confirmation. Usually, it should take around 30 seconds for the contract to be confirmed but, at this point, we could wait and wait, and nothing would happen.

This is because there are no other nodes in the network and no one is mining, and ethereum much like Bitcoin right now works as a Proof of Work network, I will not go into the details, but you can read the following article for a thorough explanation:
Explaining blockchain — how proof of work enables trustless consensus
Let's get our contract verified by jumping into our node console and typing:
miner.start()It will take about 12 transactions for the contract to be confirmed, once that is done we can stop the miner by typing:
miner.stop()Looking at the latest transactions our contract should be now verified, we can confirm that by going into the "Contracts" tab and we should see our newly created contract.
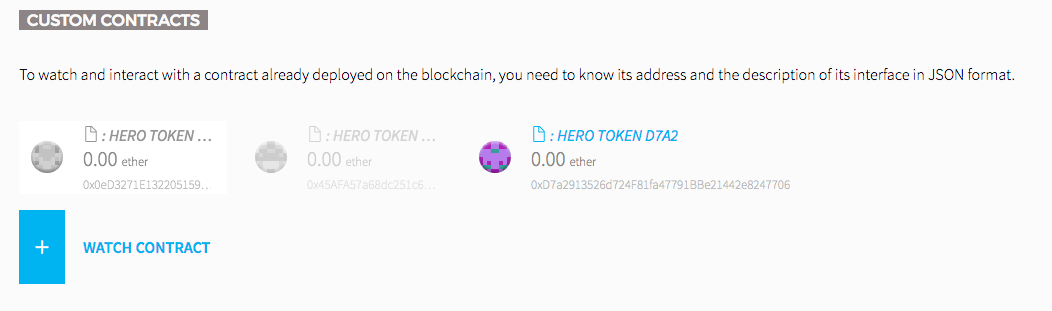
Click on it to go to its page. Click "copy address" and paste the contract address into a text editor, you will need it shortly.
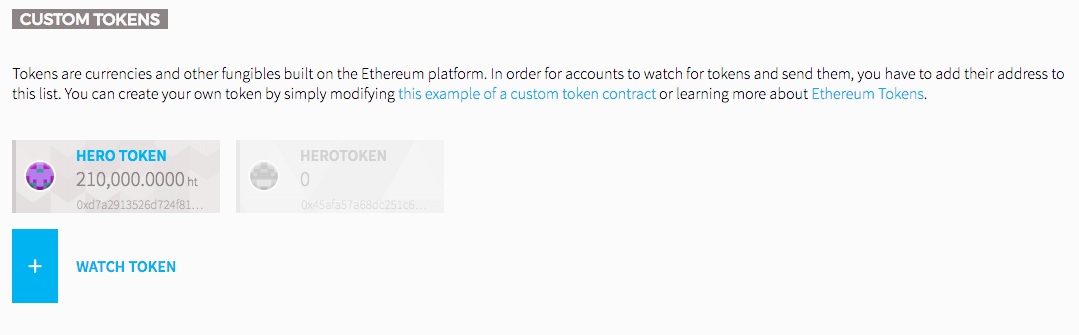
If you click your wallet address, there is no indication of those tokens being there, did something went wrong? Well no, Wallets only track tokens it knows about, and we have not told our wallet to track our brand new token.
Tracking Tokens
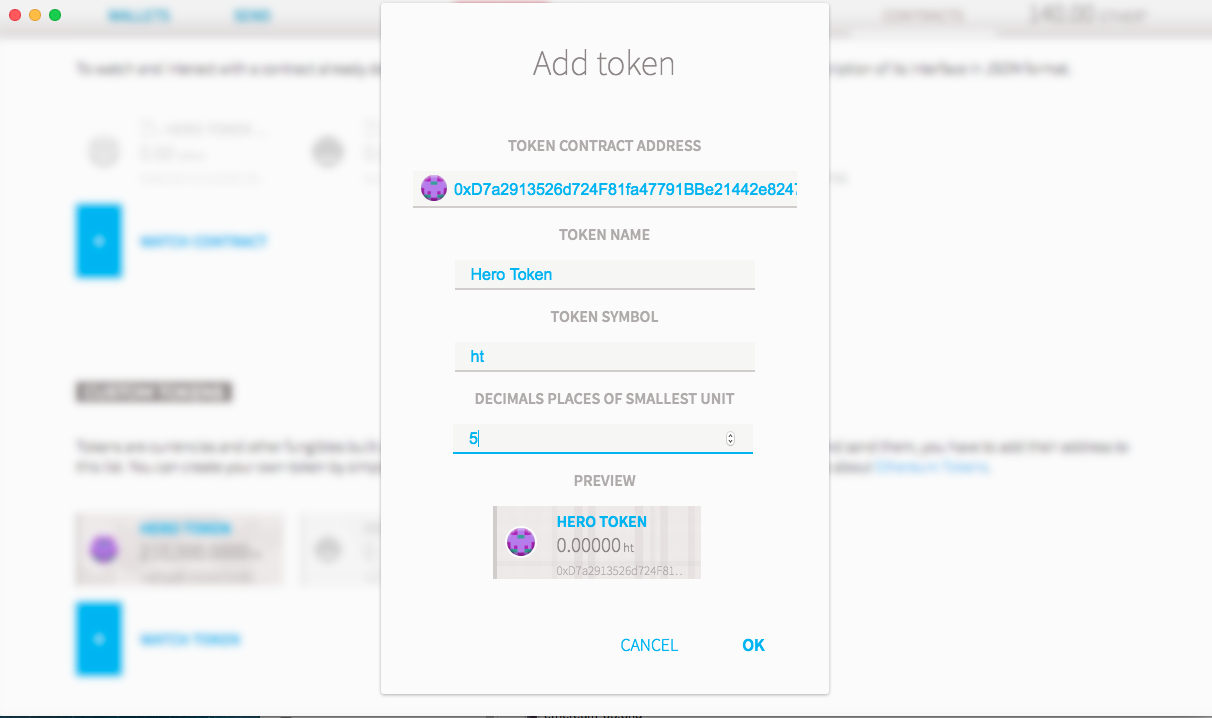
- Go to the Contracts page
- Click the Watch Token Button
- A popup will show up, copy the address of the contract as well make sure to enter all the details
- Click Ok
Now if you go back to your wallet you should see that is tracking tokens as the screenshot below.
Congratulations! You successfully created your first token.
Next Steps
While we successfully created a basic token, right now is not every useful. In the next post, we will improve our HeroToken contract and add more advanced functionality.